
ADVERTISEMENT
Introduction
There’s something undeniably enchanting about a perfectly crafted whipped cream cake. It evokes images of joyful celebrations, sun-drenched picnics, and the simple pleasure of a light, ethereal dessert. Unlike its buttercream-laden counterparts, a whipped cream cake offers a delicate sweetness and an incredibly airy texture that melts in your mouth, leaving a refreshing finish. It’s a dessert that feels both elegant and approachable, a true crowd-pleaser that never goes out of style. The beauty lies in its simplicity, allowing the pure, creamy flavor of the whipped topping to shine, often complemented by the subtle notes of vanilla and a tender cake base.
This recipe isn’t just about baking a cake; it’s about creating a masterpiece, a visual and culinary delight that will impress and satisfy. We’ll guide you through every step, from preparing a wonderfully moist and fluffy cake batter that serves as the perfect foundation, to mastering the art of whipping cream to absolute perfection – stable, luscious, and ready for decorating. The star of our show is the exquisite rosette decoration, a classic technique that transforms a simple cake into a stunning centerpiece, exuding charm and sophistication. Imagine the gasps of delight as you present a cake adorned with delicate swirls, each one a testament to your newfound baking prowess.
Whether you’re celebrating a birthday, an anniversary, or simply want to elevate a weeknight dessert into something extraordinary, this guide will equip you with all the knowledge and techniques needed to achieve a professional-looking and incredibly delicious whipped cream cake. We’ll demystify the process of working with whipped cream, offering crucial tips to ensure it holds its shape beautifully, even in warmer conditions. Get ready to embark on a delightful baking journey that promises not just a cake, but an experience – from the moment you whisk your first ingredient to the blissful first bite of your very own whipped cream masterpiece.
ADVERTISEMENT
Nutritional Information
Per serving (approximate values, based on 12 servings for a standard 8-inch cake):
Calories: 420 kcal
Protein: 5g
Carbohydrates: 55g
Fat: 20g
Fiber: 1g
Sodium: 250mg
Ingredients
For the Vanilla Cake Base:
2 ½ cups (300g) all-purpose flour, sifted
1 ½ cups (300g) granulated sugar
1 tablespoon baking powder
½ teaspoon salt
1 cup (226g) unsalted butter, softened
4 large eggs, at room temperature
1 cup (240ml) whole milk, at room temperature
2 teaspoons pure vanilla extract
For the Whipped Cream Frosting:
4 cups (960ml) heavy cream (cold, at least 36% fat)
¾ cup (90g) powdered sugar, sifted
2 teaspoons pure vanilla extract
1 teaspoon unflavored gelatin powder (optional, for stabilization)
2 tablespoons cold water (optional, for gelatin)
Instructions
Prepare the Cake Base: Preheat your oven to 350°F (175°C). Grease and flour two 8-inch round cake pans, or line with parchment paper circles.
In a medium bowl, whisk together the sifted flour, granulated sugar, baking powder, and salt. Set aside.
In a large bowl, using an electric mixer on medium speed, cream the softened butter until light and fluffy, about 2-3 minutes.
Add the eggs one at a time, beating well after each addition until fully incorporated. Scrape down the sides of the bowl as needed.
Reduce mixer speed to low. Gradually add the dry ingredients to the wet ingredients in three additions, alternating with the milk, beginning and ending with the dry ingredients. Mix until just combined after each addition; do not overmix.
Stir in the vanilla extract until just incorporated.
Divide the batter evenly between the prepared cake pans.
Bake for 28-32 minutes, or until a wooden skewer inserted into the center of the cakes comes out clean.
Remove cakes from the oven and let them cool in the pans for 10-15 minutes before inverting them onto a wire rack to cool completely. Ensure cakes are completely cool before frosting, ideally for at least 2 hours or even overnight.
Prepare the Stabilized Whipped Cream (Optional, but Recommended): If using gelatin, in a small microwave-safe bowl, sprinkle the unflavored gelatin powder over 2 tablespoons of cold water. Let it sit for 5 minutes to bloom.
Microwave the bloomed gelatin for 10-15 seconds, or until completely dissolved and clear. Let it cool slightly but do not let it set. Ensure it is cool to the touch before adding to the cream.
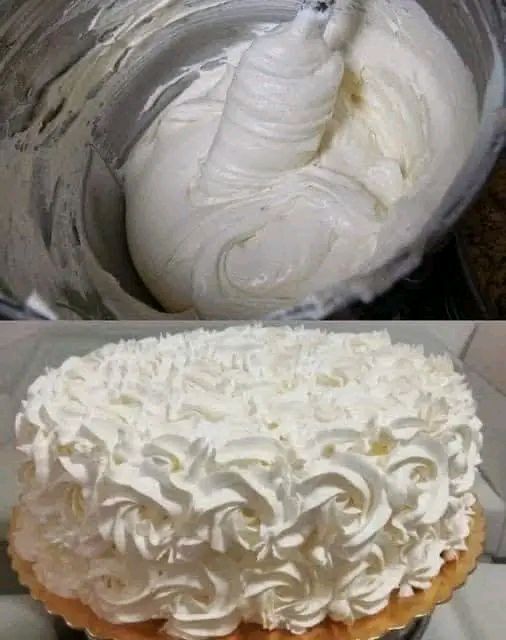
Whip the Cream: Ensure your heavy cream, mixing bowl (preferably metal), and whisk attachment are thoroughly chilled. Place the cold heavy cream, sifted powdered sugar, and vanilla extract into the chilled mixing bowl.
If using dissolved gelatin, slowly drizzle the slightly cooled gelatin mixture into the cream while the mixer is on low speed.
Begin whipping on low speed, gradually increasing to medium-high speed. Whip until soft peaks form, then continue whipping until stiff peaks are achieved. Be careful not to over-whip, as it can quickly turn into butter. The cream should hold its shape firmly when the whisk is lifted.
Assemble and Crumb Coat the Cake: Once the cakes are completely cool, use a serrated knife to level the tops of the cakes if desired, creating flat surfaces.
Place one cake layer on your serving plate or cake stand. Spread about ½ to ¾ cup of whipped cream evenly over the top.
Carefully place the second cake layer on top.
Apply a thin layer of whipped cream all over the top and sides of the cake. This is your crumb coat, designed to trap any loose crumbs.
Refrigerate the cake for at least 20-30 minutes to allow the crumb coat to set. This step is crucial for a clean final frosting layer.
Final Frosting and Decorating: Once the crumb coat is set, apply a thicker, more even layer of whipped cream over the entire cake, smoothing it out with an offset spatula or cake scraper. You can leave it smooth, or prepare for rosettes.
For the rosette decoration, fit a large star tip (such as Wilton 1M or 2D) into a piping bag. Fill the piping bag about two-thirds full with the remaining whipped cream. Do not overfill, as the warmth from your hands can cause the cream to deflate.
Starting from the top edge of the cake, pipe rosettes. To create a rosette, apply even pressure and start piping from the center, spiraling outwards in a tight circle until you complete one rosette. Release pressure to finish.
Continue piping rosettes, working your way across the top of the cake, slightly overlapping each one to create a full, lush effect.
Once the top is covered, move to the sides of the cake. Pipe rosettes in rows, again overlapping slightly to cover the entire surface, working from top to bottom.
If your whipped cream in the piping bag starts to become too soft, place it in the refrigerator for a few minutes to re-chill. If you run out, whip a fresh small batch of cream.
Once decorated, refrigerate the cake for at least 30 minutes before serving to allow the whipped cream to set firmly.
Cooking Tips and Variations
See more on the next page to continue reading →
ADVERTISEMENT